Wednesday, November 23, 2016

Vintage Bride

Our hostess for this week's challenge at the Sisterhood of Crafters is Agata. Your challenge is to use pearls somewhere on your project.

When I see pearls, I think of weddings. Most wedding gowns and veils have pearls included in the design. I found this beautiful photo of a 1920's bride on Pinterest

I started with a base card of white card stock and added a silver panel. Next I covered a piece of black card stock with netting enhanced with white glittered hearts, then adhered this to the silver panel. The image was matted with a black mat and then a silver mat. After stamping the sentiment onto white card stock, I added a black and a silver mat and adhered with glue runner to the card. Last I added the daisies with pearl centers.

So, now it is your turn. Head over to the Sisterhood for more inspiration from my 'sistahs' and enter you creation. You have until 8pm, Sunday December 4th to enter. There is a limit of 3 entries per person. Have fun and good luck!

Hugs,
Terri

Thursday, November 17, 2016

Christmas Sniffles?

I have been trying to build up my items for craft shows for next year, so I started making some cute tissue box covers. I have so much Christmas themed papers to use and this is a great way to get creative besides cards.

I started with a base of Recollections Holiday Red card stock. The stocking paper is from DCWV. I added the dp to the base of the box and die cut the hole using Nestibilities oval before putting the base and the lid together. Next I used the oval and scalloped ovals to created the decorative piece for the top of the box and added pearls.

You will find the instructions for the basic box here

Right now I am focusing on Christmas covers, but will also include spring, fall and generic patterns for the rest of the year. So far I have made 2 Christmas patterns and one with snowmen for winter. 

I have entered this project in the Crafty Purple Frog Challenge "Magic of Christmas".

Thanks for stopping by and visiting with me today. Happy Crafting!

Hugs,
Terri

Wednesday, November 9, 2016

Let Your Dreams Take Flight

Vickie is our hostess for the new challenge at the Sisterhood of Crafters. The theme is "Up, Up and Away" (anything that flies). 

I chose to use an image of an airplane as my focal point. I was thrilled to find the perfect images on Pinterest.


I used the image of a newspaper clipping for the background, then matted the airplane picture with gray and black mats. I typed the sentiment on my computer and used the same colors to mat this panel. Pop dots were used to give dimension.

Wouldn't this make a great masculine retirement card? Could also be used for graduation or someone who just received a promotion.

I really enjoyed working with this theme. It can be interpreted in so many ways. Looking forward to seeing what you create.

I have entered this card in the following challenges.

Digi Choosday - Anything Goes 
Sunny Day Crafting - Anything Goes
Inspiration Destination - Anything Goes 
Crafty Girls Creations - Anything Goes
 
Now head on over to the Sisterhood for more inspiration and enter your project. You have until 8pm (est), Sunday November 20th to enter.

Hugs,
Terri

Thursday, November 3, 2016

Pumpkin Thief

Hello everyone! We have been enjoying some Summer temps over the last couple of days here in Northeast Ohio (in the 70's), but the forecast for starting today is fall temps in the 50-60 degree range. Today begins another challenge at Crafting With An Attitude and I have created a fall card using an image from our sponsor A Day For Daisies called "Pumpkin Patch Thief".
A panel of DCWV fall designer paper was layered onto a white card stock base for the background. The image was colored with prismacolor pencils and cut out by hand. The leaves were created using my Fiskars small leaf punch. Last I cut 2 fancy labels using my EK Success fancy label punch. The sentiment was stamped with Fun Stampers Journey "Dark Roast" ink onto Recollections yellow card stock then I cut the orange label in half and adhered to the back of the yellow for a shadow effect. The sentiment panel and image were adhered with foam dots for dimension. Green and white striped ribbon was tied in a bow and adhered to the sentiment panel with a glue dot.

I just love the face on the racoon. He looks so sweet and innocent. Too bad they aren't like that for real. A few years ago 2 baby racoons were caught in our garage and they can be mean. Had to call someone to get them out. Thankfully, he place a humane trap in the garage with some cat food to try to catch them and then release them into the woods. However, when he returned the next day, they had eaten all the food and went out the open door. The only mess they left was paw prints on the car and garage doors.

We would love to have you join in our challenge. Stop by Crafting With An Attitude to see my DT's inspiration projects and to get all the details. This is always "Anything Goes" challenge and you are permitted 3 entries. You have until 8pm Sunday, November 27th to enter. Our sponsor is offering 3 digi images to the winner.

Also watch for my Design Team Call announcement. I would like to add 5-6 more members to the team. Details will be available on the challenge blog Friday.  

Hope to see you there.

Hugs,
Terri 


Wednesday, October 26, 2016

Pumpkin Flower Bouguet

Today's challenge at the Sisterhood of Crafters, hosted by Darlene, is "Pumpkins or the Color Orange". I decided to create a basket to hold flowers for the centerpiece of my dining table. There were so many fall silk flowers to choose from at the craft store, I had a hard time deciding on which ones to use. I finally decided on these yellow-orange, red and orange ones.

I found the template for this cute basket here. This was such a fun and easy project, I think I will make more for Halloween treats for the grandchildren.

The basket was printed on an 8 1/2" x 11" piece of Recollections card stock and cut out with scissors. The handle is a 1 1/4" x 11" strip of the same card stock adhered to the inside of each side of the basket with sticky strip. Easy peasy!

I have entered this basket in the following challenges:

Crafty Gals Corner - Anything Goes 
Simon Says Stamp - Autumn
Craft Your Passion - Always Anything Goes
Robyn's Fetish - Anything But A Card

Okay, now it's time to head on over to the Sisterhood to check out the 'sistah's' inspiration projects and enter your creation. You have until 8pm (est), Sunday November 6th to enter. There is a limit of 3 entries per person. Have fun and Good Luck!

Hugs,
Terri 

Wednesday, October 12, 2016

Pocket Money

Hello everyone! As I told you yesterday I needed to begin working on gift card holders. So today, I have three designs to share with you. The instructions can be found here.

These card holders were very easy and quick to put together.  Just a 3 1/4" x 10" piece of card stock scored at 4" and 8". The sleeve is a 7 1/2" x 3 1/2" piece of card stock scored at 7" and 3 1/2".

I used DCWV Christmas designer paper for the sleeves. Before folding and gluing the flap for the gift card, I used Versamark and two different size snowflake stamps to stamp the inside and outside of the card. Secure the 2" flap with sticky strip to form the card pocket. To make the sleeve, fold on the score lines, add adhesive to the 1/2" flap and fold 4" side down to adhere to 2" flap. Decorate as desired.

I used my fancy label punch to make the sentiment tag. I used my brown and red ink pads to swipe color around the edges of the labels for the red and green card holders.

I hope you enjoyed my project or today. Now back to work on more Christmas projects.

Thanks for stopping by.

Hugs,
Terri

Beautiful Blooms

It is my turn once a gain to hostess The Sisterhood of Crafters challenge. Usually, I would have chosen some type of fall theme: such as pumpkins, scarecrows or Halloween. But this time I wanted to do something a little more creative. So, your challenge is to use gingham and flowers somewhere on your project.

I found this beautiful gingham paper in the Michael's Recollections "Home Basics" paper pad and the flower paper is BoBunny.
I started with a card base of Stampin' Up "Pink Pirouette" card stock. First I applied the pink gingham panel to the top card, then added a panel of the flower designer paper. To cover the joint of the two pieces of designer paper, I used this beautiful vintage lace that I purchased at a yard sale this summer. (It was in a storage gallon bag filled with different types of lace for $1.00.)
The pink on this lace looks like sleeveless dresses. The inside of the card was covered with the pink gingham paper. I then added a strip of the flower paper and adherred another piece of lace over that. Ivory satin ribbon was tied around both sections and tied in a bow. The image came from the pack of BoBunny paper and is layered on a Pink Pirouette mat and a Chocolate Brown mat. The pink paper flowers and white paper flowers are from Michaels.

I haven't added a sentiment yet, because I am not sure how I am going to use this card. It would be perfect for Birthday, Thinking of You, Mother's Day, etc.

I have entered this card into the following challenges:

Sunny Day Crafting - Anything Goes
Retarte - Anything Goes 
Inspiration Destination - Anything Goes 
Great Impressions - Anything Goes 

Now that I have shared my project with you, why not stop by the Sisterhood for more inspiration from my 'sistahs'? You have until 8pm Sunday, October 23rd to enter. Limit of 3 entries per person and no back dating please.

Happy Crafting!
Terri

Tuesday, October 11, 2016

Gone Fishin"

Today I have another masculine card to share with you. My dad loved to fish and would often take the whole family out to the lake for a day of fishing. I am not a big fan of fishing, because I don't like putting worms on a hook or taking the fish off. Too slimy for me.

So in honor of my dad, I chose to use this beautiful image of fishing gear that I found on Pinterest.


The card base is tan with ivory dots. I used ivory and dark brown card stock to make mats for the image. Looking through my stash of buttons I came across the hat and basket. Last I stamped the sentiment onto ivory card stock with dark brown ink and layered that onto a strip of dark brown card stock. I made this into a birthday card, but I think it would also make a nice retirement card.

I think I am finally over my fear of making cards for the guys. I have a few more ideas, but need to stop and start working on Christmas cards and gift card holders. Can you believe Christmas is only 2 1/2 months away?

I don't have to send many Christmas cards, because I see most of my friends and family around the holidays. I know I will get orders for gift card holders, so guess I'd better put on my thinking cap and get busy.

Have a great day and Happy Crafting!

Hugs,
Terri 

Monday, October 10, 2016

Your A Classic

Masculine cards have always been difficult for me to create. I have been working hard to do better with my designs. Today I want to share my card made with an image I found on Pinterest using an vintage car.


The card base is from a set of cards and envelopes I found on sale at Michaels. The blue on the image and my card base were a perfect match. Next I cut a mat from black card stock and one from silver and layered them onto my card base. The image was adhered onto the silver using a tape runner. The gears were cut from black card stock on my Silhouette Cameo. I am still trying to decide if I want to add ribbon and if so, what color to use - black or silver?

I am very happy with the way my card turned out. I am beginning to feel better about making cards for guys.

Well, that's all for today.

Hugs,
Terri

Thursday, October 6, 2016

Sunflower Sprite

Today our new challenge at Crafting With An Attitude begins. As always, the challenges are "Anything Goes". Our sponsor for this challenge is:

Aurora Wings
 
I chose this cute "Sunflower Sprite" as the focal point of my card.

Prismacolor Scholar colored pencils were used to color the image. I fussy cut around the image then layered it onto a white scalloped circle, lime green scalloped circle and a paper doily with pop dots.

The background paper is by DCWV adhered to a white card base. The sentiment was stamped with brown ink onto a panel of yellow, then layered onto a strip of lime green and adhered onto the card with tape runner. The yellow foam rick rack has been in my stash forever, but didn't know what to use it for until now. Last I added the two daisy buttons with dots. Last I added the yellow grosgrain ribbon and tied it into a knot.

If you would like to enter this fun challenge, just head over to the Crafting With An Attitude Challenge Blog and check out my design team's inspiration projects and enter your creation. 

The challenge ends at 8pm (est) Sunday, October 29th to enter. No back dating please and a limit of 3 entries per person.

Thanks for stopping by. Have a wonderful day.

Hugs,
Terri

Wednesday, September 28, 2016

Hello, Scarecrow

Hello everyone! Today begins a new challenge at the Sisterhood of Crafters with Diane as our hostess. The theme is "Fall Harvest" - anything to do with a fall harvest, tractors, apples, corn, pumpkins, scarecrows, gourds, Indian corn, acorns, grapes, sunflowers... etc.

The focal point of my card is a scarecrow in the pumpkin patch that I found on Pinterest. Love all the beautiful fall colors in this image.
I started with a base of Ivory card stock and adhered the panel of DCWV plaid designer paper. The image is matted with dark brown and yellow card stock. I used my SU pansy punch to create the mat for the sentiment panel and my SU 1 1/4 circle punch for the sentiment. The image and sentiment panels are adhered with pop dots for dimension. The yellow daisy is from Mike's Favor Embellishments. Last I wrapped brown organdy ribbon around the front of the card and tied in a bow.

I have entered this card in the following challenges:
Cardz 4 Galz - Fall/Autumn Colors 
Sunny Day Crafting - Anything Goes

Finished just in time, as it seems fall has finally arrived here in Northeast Ohio. Calling for temps in the high 60's and low 70's all week. I love this time of year with all the beautiful colors and it hopefully my allergies will get a break until next Spring.

I hope you like my project for today. Now why not head on over to the Sisterhood for more inspiration and enter your project. Limit of 3 entries per person and you have until 8pm, Sunday October 9th to enter. Hope to see you there.

Hugs,
Terri

Wednesday, September 14, 2016

Halloween Color Challenge

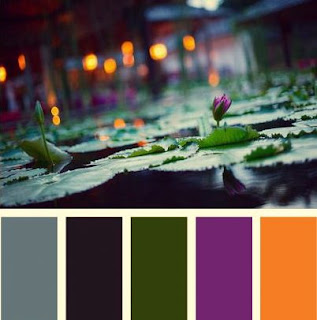
Darlene is our hostess at The Sisterhood of Crafters Challenge that begins today. Your challenge is to use at least 2 of the following colors (or shades of these colors) on your project.

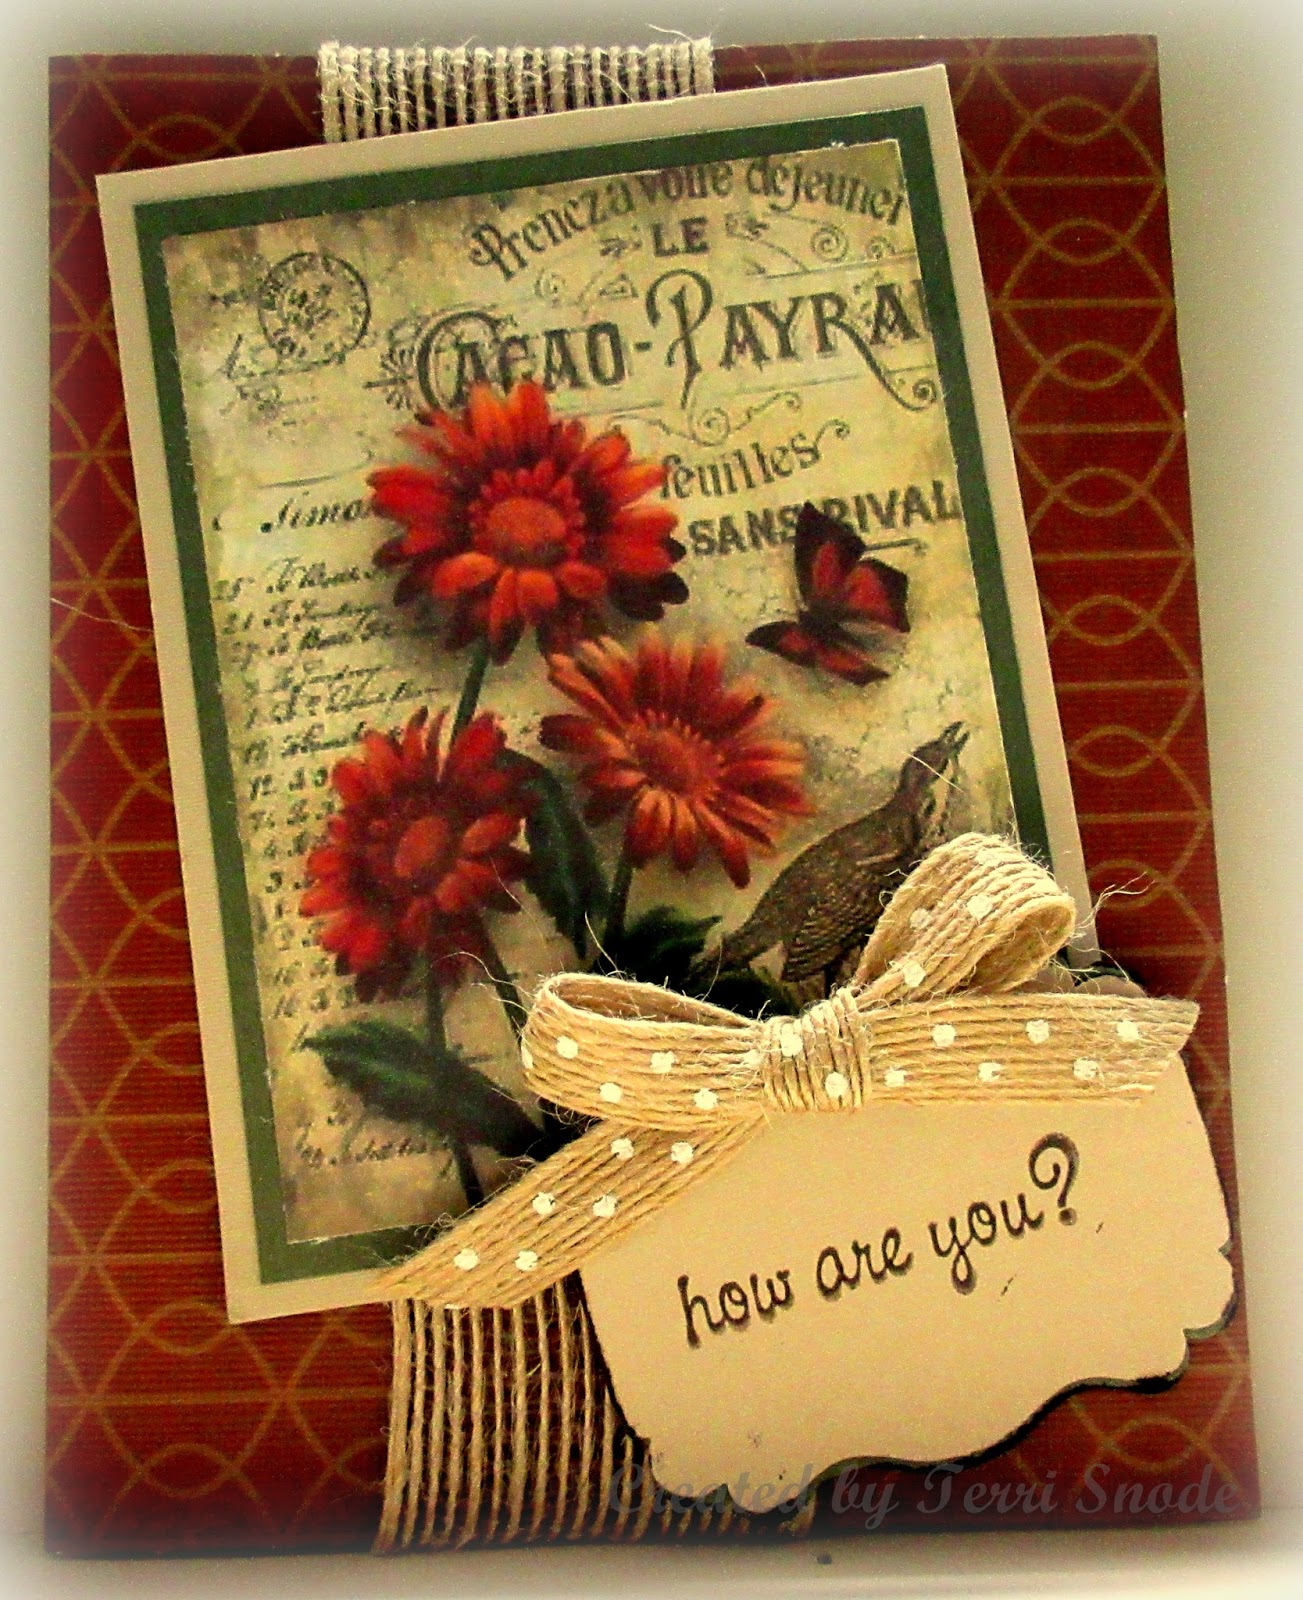
I chose to use 2 of my favorite Halloween colors: Lavender and Lime Green. I am not a big fan of Halloween, but I do love to see all the children dressed in their costumes for trick or treating. I usually create some kind of special treat holder to give my grandchildren and to use for challenges around Halloween, but this time I decided to make a "How are you?" card to send to my husband's aunt in Washington State near Seatle. She has been having some health issues and this will make the perfect card for keeping in touch.
                  
         front                                                     inside
 
The base of the card is Stamin' Up's Lacy Lavender card stock and the lime green is just a piece I found in my stash. The backgound paper is by DCWV. It is hard to tell from the picture, but there is lime green mixed in with the lavender print. A Fiskars doily punch was used to create the border down both sides of the gate fold. The paper flowers on the front of the card were found in the dollar bins at Michaels. The flowers on the inside of the card are from the wedding department at Pat Catan's. Before adding the panels to the inside of the card, I adherred the lime green gingham ribbon. Using one of my EK Success label punches I created the sentiment panel by cutting a label from white and lavender. The senitment stamp "how are you?" was in the dollar bin at Pat Catan's.

The challenge ends 8pm Sunday September 25th. Limit of three entries per person and no back dating please.

For more inspiration, head on over to the Sisterhood and check out the projects created by my 'sistahs'.

Have a great day!

Hugs,
Terri

Tuesday, September 13, 2016

Guy's Get Well

While looking through my collection of cards, I realized that I don't have a lot of get well cards to send to men. That was my goal for today. 


Looking through my stamp sets, I happened upon the "Walk in the Wild" set by Stampin' Up. I haven't used this set very much and decided that this little quail stamp would be perfect. Then I remembered the grass stamp from the Wetlands stamp set and my card design came together.

The quails were stamped on a cream card stock with Fun Stamper's Journey Dark Roast ink. Then I used the same ink to stamp the grass onto the bottom of the grass card stock. I created a mat from dark brown card stock and adhered the quail panel to it. Next I added this panel to the card base and added a brown organdy ribbon tied in a knot. The get well tag was created with my Stampin' Up word punch and adhered under the ribbon with glue dots.

I will definitely be using these stamp sets to create more masculine cards.

That's all I have for you today. Thanks for stopping by.

Hugs,
Terri


Monday, September 12, 2016

Autumn Leaf

It is still summer here in Northeast Ohio. Temperatures in the 70's and 80's this week, but I am looking ahead to cooler days. I am beginning to work on some fall themed cards. I do make a few Halloween items, but my favorite holiday is Thanksgiving. I love working with all the gorgeous fall colors.

My project for today is one that I "CASED" from Pinterest found here

I started with a 4 1/4" x 11" card base folded in half using SU's Really Rust card stock. Next I added a 5 1/4" x 4" panel of beige card stock. The image panel is matted with a 3 1/2" x 4 3/4" Really Rust mat. The maple leaf from SU's "Autumn Leaf Prints" stamp set was stamped onto cream card stock (3 14/" x 4 1/2") with Versamark and embossed with clear embossing powder. Scattered Straw distressed ink was sponged over and around the leaf first. Next I sponged Shabby Shutters and last Wild Honey distressed inks. Brown organdy ribbon was wrapped around the panel and tied in a bow, then the panel was adhered to the base with glue runner.

This will be one of the cards for my card class in October. I still have to decide on a design for the second card and a 3D project.

Thanks for visiting with me today. Stay safe and Happy Crafting.

Hugs,
Terri 

Wednesday, September 7, 2016

Fall Blooms

I love all the beautiful fall flowers that are starting to appear. My favorites are sunflowers, zinnias, dahlias and chrysanthemums. My project for today was a very quick and easy card.
After printing this beautiful image from Pinterest, I cut it down and added mats of dark green and kraft. card stock. The card base is from a set I purchased at Joann's. I added a piece of burlap ribbon, then added the image panel on top. Next, I punched a fancy label from the kraft card stock and the green card stock. I cut the green label in half, then place glued each half to the ivory offsetting it enough to look like a shadow. The sentiment was stamped with Fun Stampers Journey "Dark Roast" ink. I also inked the edges of the tag with the same color. Last I added the bow made from white dotted burlap ribbon.

I am having so much fun working with the images I find on Pinterest. I've used most of what I had printed, so now it's off to find more.

Thanks for visiting with me today.

Hugs,
Terri

Tuesday, September 6, 2016

Sunflower Blooms

My project for today includes another fabulous image from Pinterest. Not only do I love the look and color of the sunflowers, but I love to add sunflower seeds to my salad for a little extra crunch. I just might have to try growing sunflowers sometime.

For this card I chose some designer paper ( I think it looks like burlap) from a paper pad that I have had forever. It is so old that the cover has fallen off. I think it might be DCWV paper. The mat for the image has a wood grain look and is from the same pad. The sentiment stamp is from Stampin Up. I found the brown buttons in one of my button jars. The bow was created using twine and ahered with glue dots.

I am really looking forward to cooler temperatures and beautiful fall colors. It was a beautiful day today with temps in the mid-70's. By the end of next week, we are to have more days in the 90's. But I am not complaining, because before long we will begin to see that white stuff falling and freezing temperatures. I'm not ready for that.

I hope you are having a wonderful, relaxing day. 

Hugs,
Terri

Monday, September 5, 2016

Aqua Sympathy

Isn't this floral image from Pinterest gorgeous? I love the soft colors and thought it would be perfect to use on a sympathy card.
 Once again I chose a designer paper from one of Michael's Recollection pads. I used white to create the mat for the image. The senitment was stamped with black India ink and pop dots were used to create dimension.The border was created using one of my Fiskars border punches.
The butterfly was created by cutting two butterflies with a Memory Box die and layering one on top of the other. Then to finish off my card I added an aqua satin bow.

With all the beautiful images I am finding on Pinterest, I will have my stash of cards built up in no time. 

Thank you for stopping by and visiting.

Hugs,
Terri

Friday, September 2, 2016

Hello Blue Butterfly

Now that my 4 year old granddaughter is in preschool every afternoon until 3:45pm, I have time to work on some projects. I am trying to build my card stash with sympathy, get well and note cards.

I found some beautiful pictures of butterflies and flowers on Pinterest and wanted to use them as the focal point. I love the bright blue of this butterfly among the green and orange background.


The background paper is from Michael's Recollection paper adhered to a white card stock base. Next I added a heart doily. The mat for the image is cut from bright blue card stock and adhered to the doily. After adding the white organdy ribbon, I placed a white pearl in each corner of the image. Last I stamped the sentiment with black India ink.

I printed enough images to keep me busy for a while. Needed some ideas for quick and simple, yet elegant cards. I am very happy with the finished project.

Well, back to work. Hope to have lots more to share with you next week.

Thanks for dropping by and as always "Have a great day!"

Hugs,
Terri
 

Thursday, September 1, 2016

Hello Autumn!

Here it is September, the kids are back in school and we are preparing for the beginning of fall. This is my favorite season. Love all the bright colored leaves, flowers and pumpkins. Our challenge sponsor is Robyn's Fetish and I could hardly wait to color this adorable little scarecrow and basket for our Crafting With An Attitude challenge.

I started with a white card stock base and adherred a panel of DCWV green gingham designer paper.  The picket fence was cut with my Silhouette cameo and adherred with tape runner. The image was colored using Prisma Scholar colored pencils and then I fussy cut around the image.
Next I attached the silk vine with white craft glue. Foam dots were used to apply the scarecrow and add dimension. Last I added these paper flowers that I found at Michaels and the sentiment was cut on my Cameo.

Now that I am in the fall mood, I will have to dig out my scarecrow,  buy some chrysanthemums and get the yard decorated. I have started walking around the lake at one of our local parks every day and hopefully I will get some great fall pictures to use in my projects.

Why not stop by the Crafting With An Attitude challenge blog and check out my design team's gorgeous inspiration projects? You have until 8pm Sunday September 25th to enter. 

Hope to see you there.

Hugs,
Terri